DOWNLOAD GUIDED SURGERY SOFTWARE
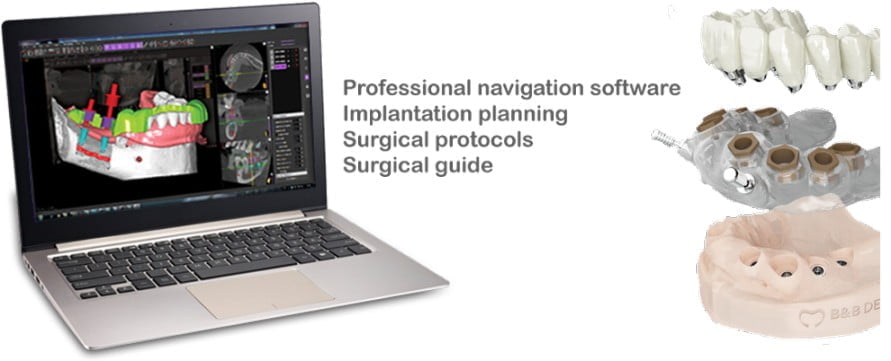
B&B Dental GS – an advanced software for computer planning of dental implantation and creation of surgical guides.
B&B Dental GS provides for: review of DICOM files (from) computer tomographs as well as STL files (from) optical scanners; planning of implants positioning; preparation for planning of individual abutments using CAD programs; creation of surgical guides
B&B Dental GS – your ally for optimal implant planning
Plan everything in advance and limit the number of sessions with the patient, greater patient comfort
with the greatest possible precision by operating in complete safety.
VIDEO TUTORIALS
FAQ
The programme can be downloaded from bebdental.it
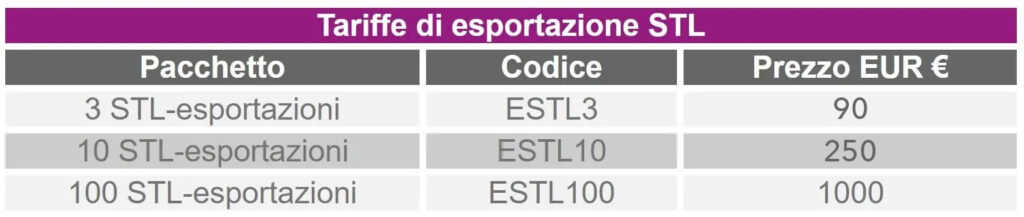
Installation and use of the programme are free of charge. Only the export of STL files is chargeable.
Operating systems from Windows 7 onwards, an OpenGL-compatible video card (e.g. NVIDIA) with at least 4GB RAM and an optical mouse with scroll wheel are required.
Yes, but there could be slowdowns or failures at any stage of the work.
After installation, the registration form must be completed, specifying a valid e-mail address. You must confirm the completed form by pressing the OK button, so the activation file will be sent IMMEDIATELY to the specified e-mail address. Download the activation file and run it. The programme will be activated.
The second activation option: restart the programme and enter the path to the key file received in the corresponding field of the registration form.
Repeat the registration by filling in all fields in the Latin alphabet. Check if the email is correct. If your mailbox has several folders for incoming messages (spam, social networks, mailings, etc.), select them all.
Write a message to info@bebdental.it
Create an empty file called ‘implastation’ with the extension ‘.imkey’ (e.g. ‘implastation.imkey’) and place it in the ‘GuideSystem’ folder. It will be placed on drive C by default.
The cloud service and guide generation will not work completely.
B&B Dental GS opens all DICOM file types. DICOM files usually have the extension .dcm.
The DICOM file can be opened by the programme: click on ‘Start. Open DICOM button “
In the opened window, select the corresponding study file and click the ‘Open’ button
CT data, in the form of a single-frame image set, are opened automatically when a file from the set is opened.
Some versions of tomographic software store DICOM files without specifying an extension.
These files are opened without further renaming and adding extensions, as usual DICOM files.
In addition, you can automatically open a DICOM file in the B&B Dental GS programme by double-clicking on a file (if no other programme is installed to display DICOM files by default).
Check whether the file has the extension dcm. If the computed tomography file has the extension .vol, it is recorded in a different format that is not available for use in B&B Dental GS. Contact the appropriate scanning centre to overwrite the data in the open DICOM format.
Some versions of tomographic software store DICOM files without specifying an extension. These files are opened without further renaming and adding extensions, as usual DICOM files.
Save the CT DICOM file in a separate folder and try again.
Use manual and automatic modes for alignment.
Surfaces cannot be combined if they are not the same. There may be several reasons for this:
– CT scan and optical scan of the oral cavity/impression were performed with a significant time difference
– error in the removal of the impression or in the manufacture of the model
– the tomograph or optical scanner has not been calibrated
– the patient moved during the CT scan.
To download plant libraries from the server, click on the Add Plant button. Click on the ‘Download from server’ button in the dialogue box. In the opened menu, mark the required implant systems and click the ‘download’ button.
To download a simplified user implant library, create implants of the required size in the implant designer and add the appropriately named implants to the library by clicking the ‘Add to Library’ button.
For the autoloading of a 3D implant model into the library, ensure that the 3D model is stored in STL format, the centre of the coordinate axes is at the centre of the occlusal surface of the implant, the Z axis is directed vertically upwards. Select the appropriate plant STL file and add it to the library with the appropriate name by clicking the ‘Add to Library’ button.
Select the appropriate implant and click the ‘Replace Implant’ button on the implant side panel.
Empty’ or non-matching key file, or no communication with the server/Internet.
No connection to the server/Internet
No connection to the server/Internet
No connection to the server/Internet
– deactivate the display of all unnecessary STL surfaces
– the first surface in the list is displayed in the guide creation dialogue box.
Change the direction of the reference axis by clicking on the ‘jaw’ button.
Update the graphics card driver. The programme uses OpenGL technology, which actively utilises the resources of the video card.